Installation
To install the eFront WordPress plugin go to: Administration Panels > Plugins > Add New and search for eFront. Find the plugin and click Install Now.

Alternatively, you can download the eFront WP plugin (v2.2.4) from here. After downloading the plugin, extract its contents into the WordPress plugins folder. You can find more information about managing and installing WordPress plugins here.
After you install the plugin you can find it in the list of installed plugins (Administration Panels > Plugins > Installed Plugin). There click on the link ‘Activate’.
Setup
After activating the plugin in order to be able to use the eFront features you need to setup some eFront details.
Go to Administration Panels > Plugins > eFront
Fill the required fields with the details for your corresponding TalentLMS domain.
- eFront Domain: The eFront domain which you want your WordPress site to link to
- eFront Admin Username: The username of an administrator’s account in your eFront domain
- eFront Admin Password: The password of the corresponding administrator’s account in your eFront domain
Attention!!
In order for your eFront WP plugin to work, you have to enable the XML API in your eFront installation. To do so login to your eFront domain with an administrator’s account and go to System Settings > External tools. There, click the Enable XML API option and make sure to configure which Ips are allowed to connect to the API. Click save and you are ready to go.

Attention!!
In order for the plugin to best integrate with WordPress you MUST change your Common Settings in the Administration Panels > Settings > Permalinks to other than default (we strongly advise that you use Post name)
Using the plugin
eFront WP plugin current offers two shortcode commands (more details here). You can use these two shortcodes in any page or post you like. Those two are:
– [efront-catalog]
This shortcode command allows you to list your eFront lessons and courses in their corresponding categories in some WP page or post.
– [efront-signup]
This shortcode command allows you to have a signup form for new users to register to your eFront system.
As soon as you activate the plugin two WordPress pages are instantly created (more details on WP Pages here). The first one is called Catalog and the second one is called Signup and each one contains the corresponding aforementioned shortcode.
Cache Control
eFront WP plugin is automatically caching all the data (courses, lessons, users etc) it retrieves from the corresponding eFront domain for optimal performance. If you need to flush your cache or to update your data stored in there by the plugin, you should clear your cache first. You can do this by going to Administration Panels > eFront and clicking Clear cache.
eFront Options – Customizing your Catalog and your Signup Page

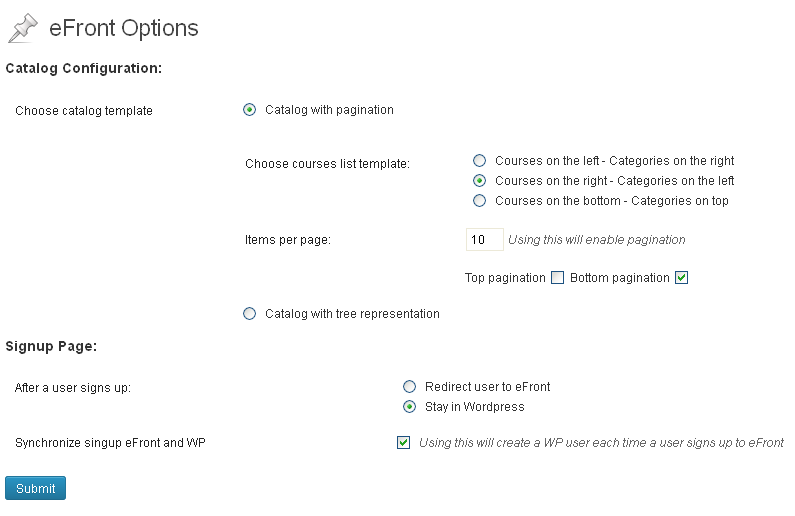
You can customize your Catalog and your Signup page by going to Administration Panels > eFront > eFront Options. There you can find all the available options about the catalog and the signup page.
Catalog:
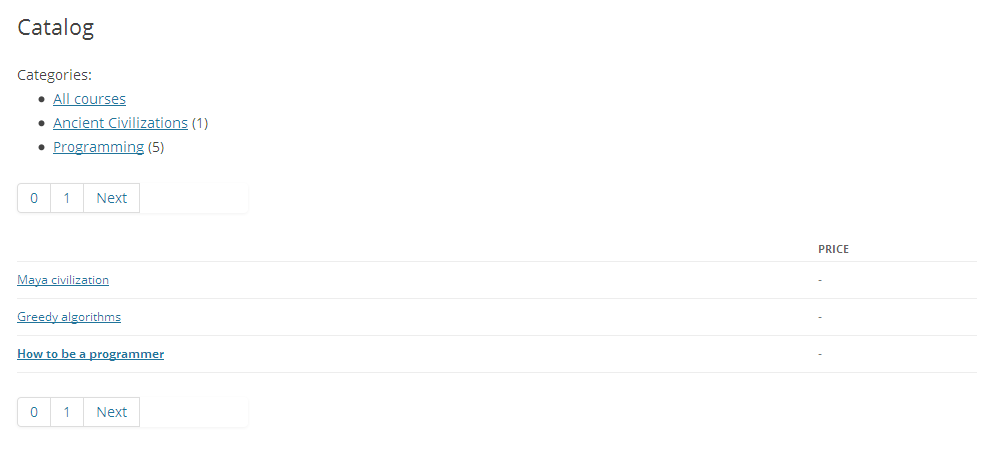
You can choose between two different templates for your catalog. The first template allows you to have your lessons and courses presented in a table with pagination enabled or not. And your courses’ and lessons’ categories on the side. You can customize the place where the categories are going to show up, how many items (lessons and courses) you are going to have per page and whether you shall have pagination links on top, on bottom or both of the list of your courses and lessons.
An example of this template you can see in the following screenshot, where categories are placed on top of courses and lessons, three items are shown per page and there are pagination links both on top and at the bottom of your lessons and courses.

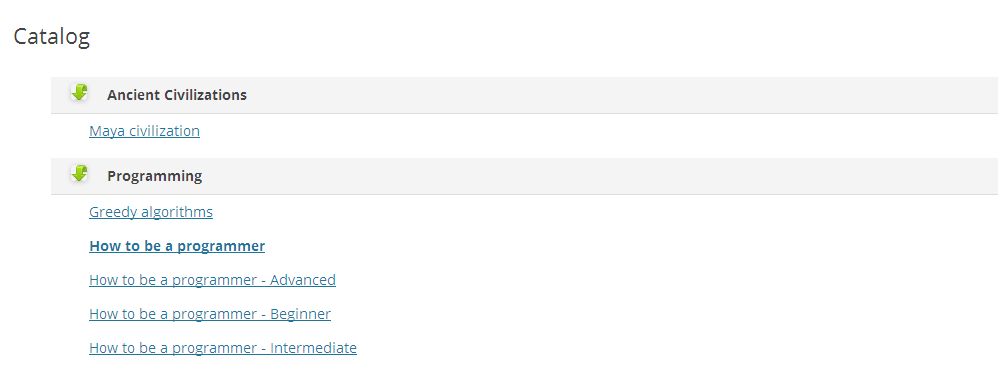
The second template allows you to have a list of your courses, lessons and their categories in a tree-like representation. The following screenshot shows an example of this template.

Signup:
For allowing new users to register to your eFront system through your WordPress site you can customize the signup process as following.
You can choose to have your users stay in WordPress after they have successfully signed up or redirect them in your eFront system.
Furthermore, you can choose whether you want each of your newly registered users to your eFront system to be registered (as subscribers – more on WP roles here) to your WordPress site or not.
eFront Sync

If you want to synchronize your eFront and WordPress users you can go to Administration Panels > eFront > eFront Sync. By doing this eFront users will be synchronized with WordPress users. If you choose to perform a hard synch, this will force the details of your WordPress users to be overwritten by the corresponding details in your eFront system.
eFront Edit CSS

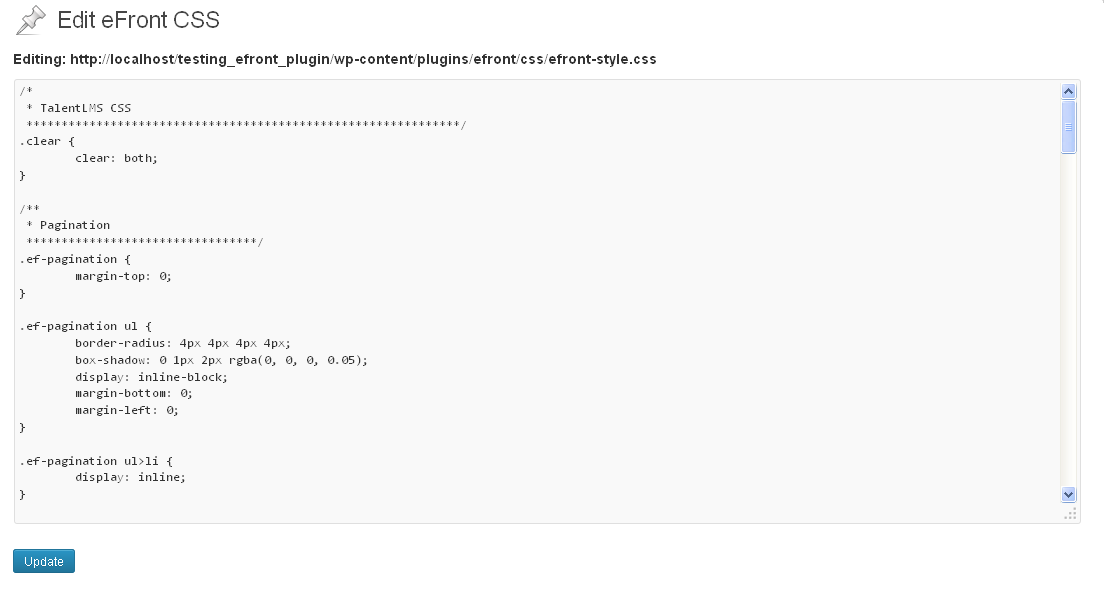
Users can add/remove or modify css rules that come along with eFront WP plugin. You can use this advanced feature to customize the way your WordPress site and the eFront plugin integrate.
Extending eFront WP plugin
If you want to extend the functionality of the eFront WP plugin take a look at the at this guide to Writing a Plugin. You are going to need PHP development skills to do so.
Feel free to extend the Plugin to use any other functionality that is made possible by the API.


